Experiment with màu sắc choices & edit your colors nondestructively by using Fill layers in Adobe Photoshop.
Bạn đang xem: Photoshop for lunch™
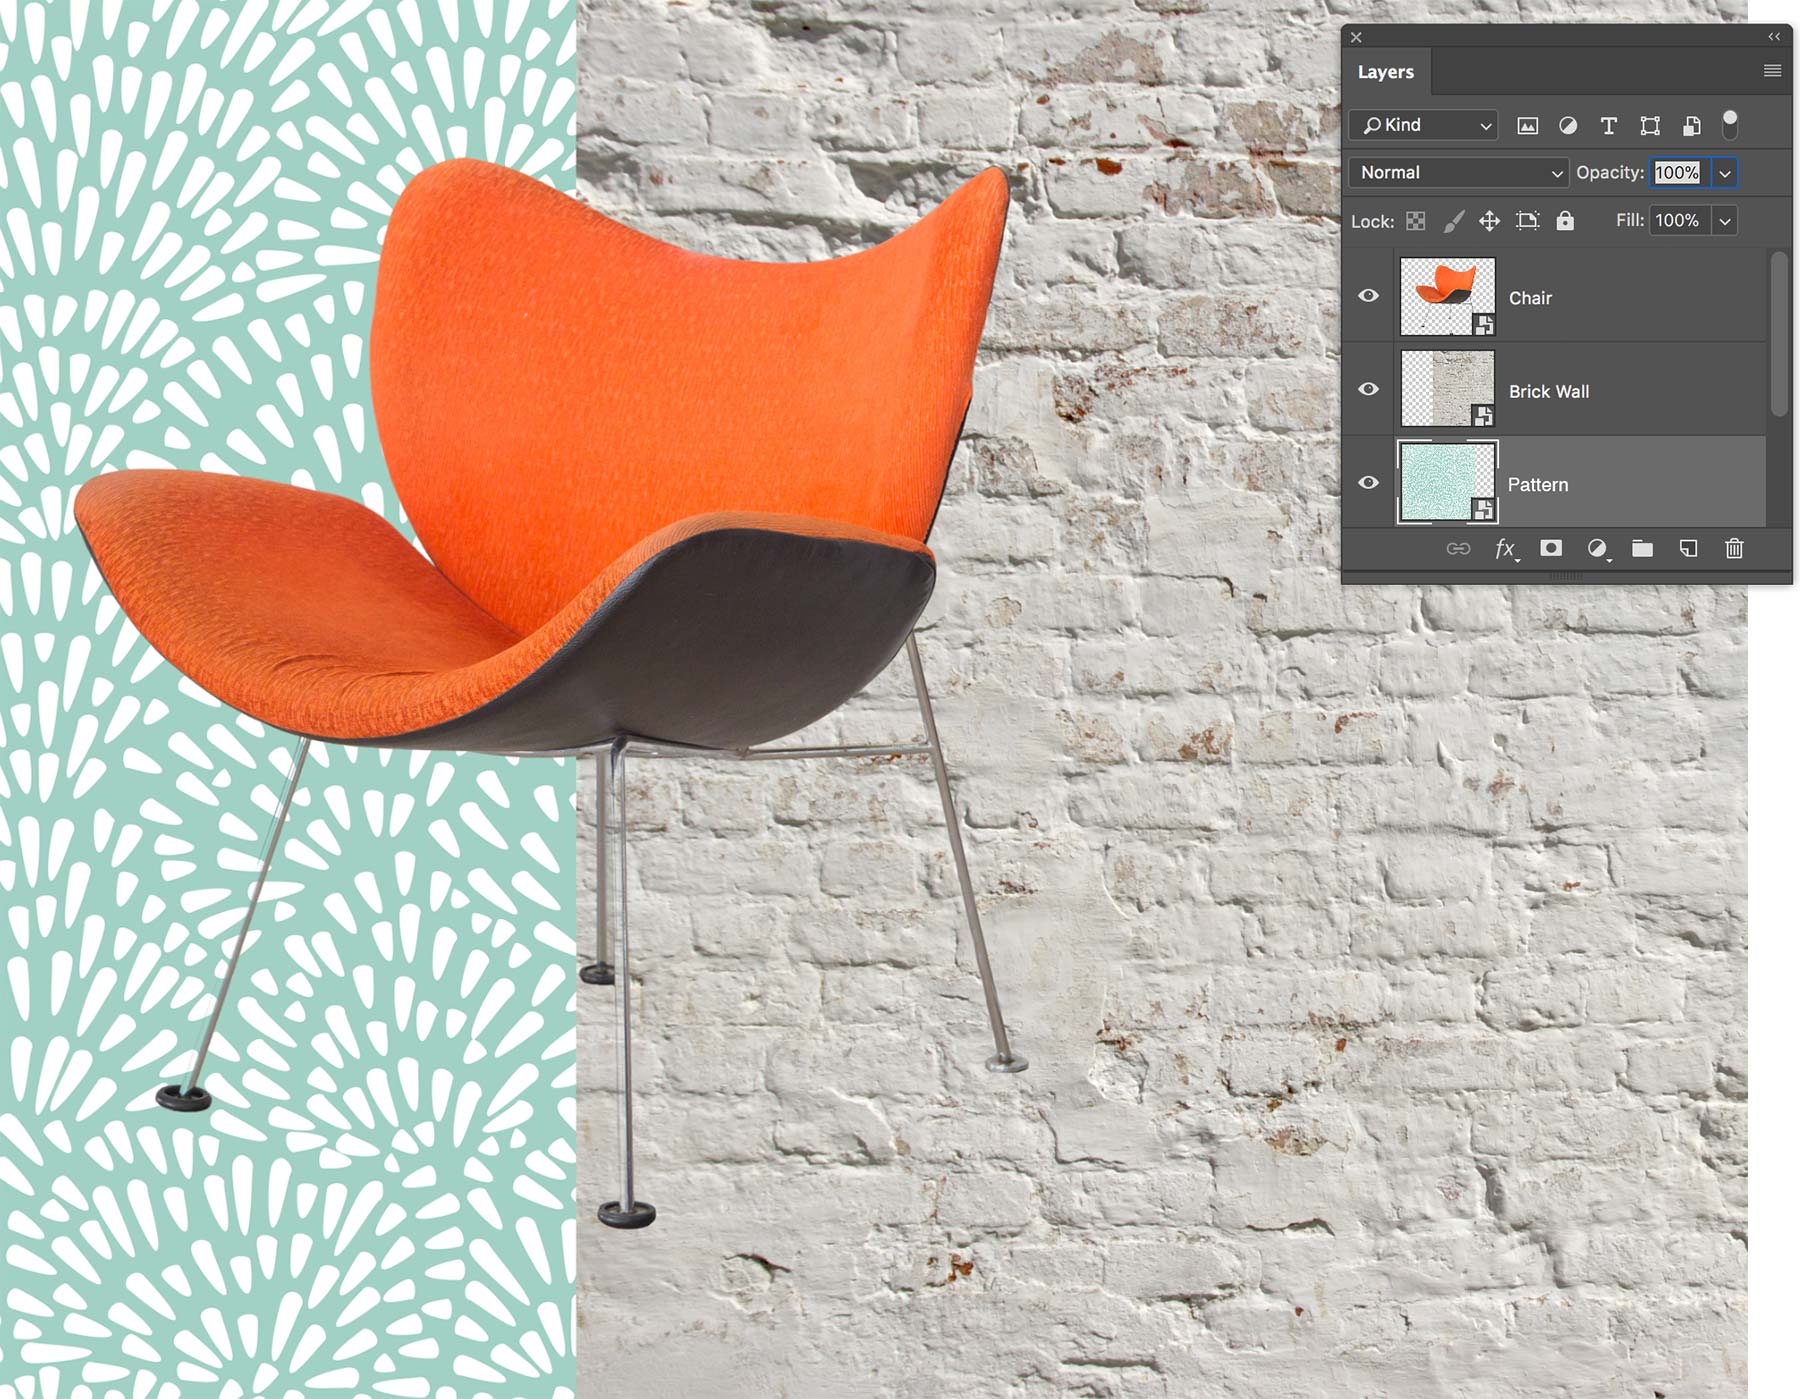
Using Fill layers khổng lồ colorize thiết kế elements makes it easy to lớn try out color combinations before settling on a final look.
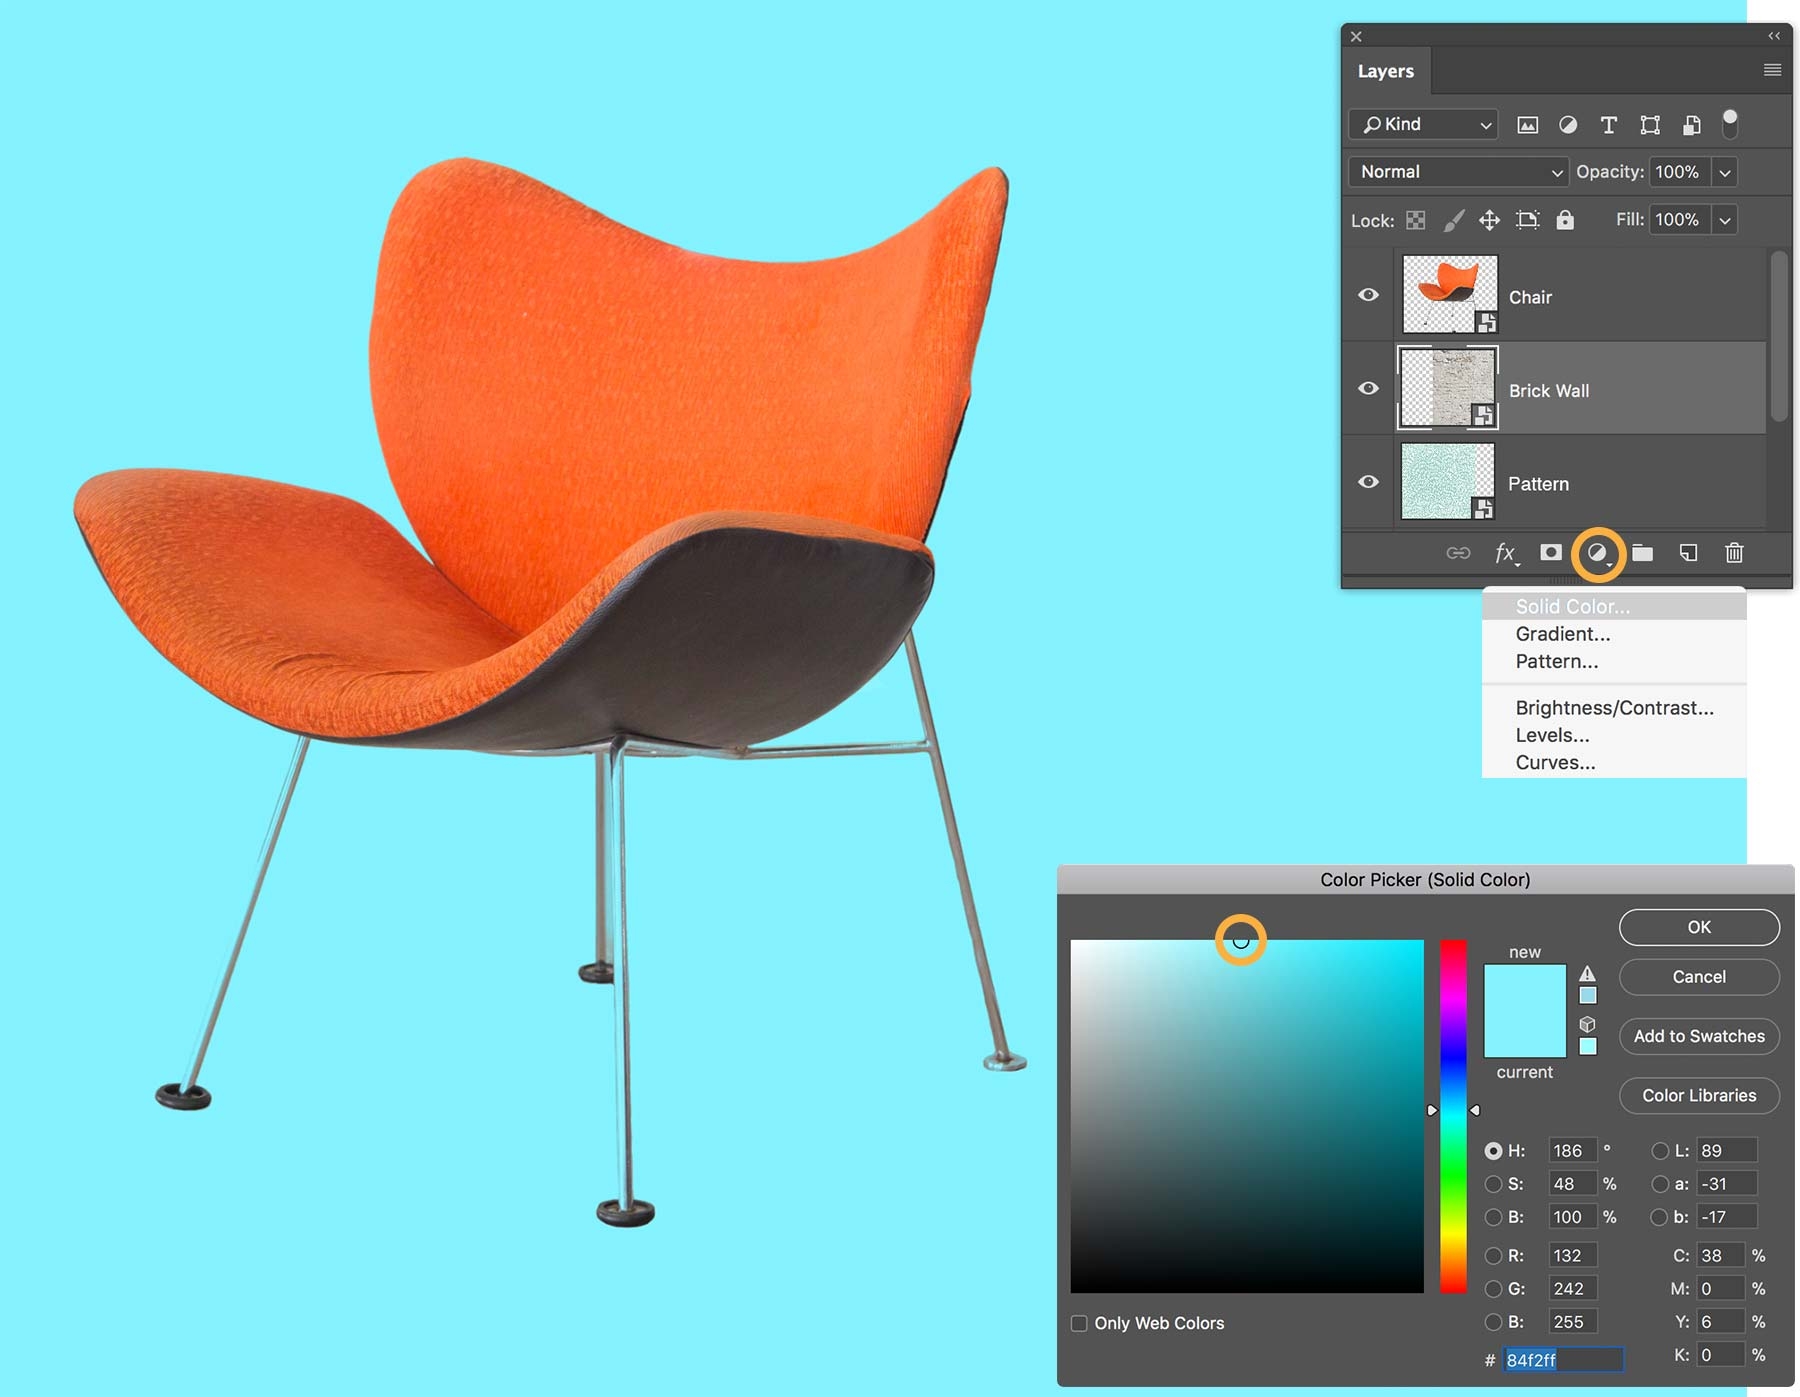
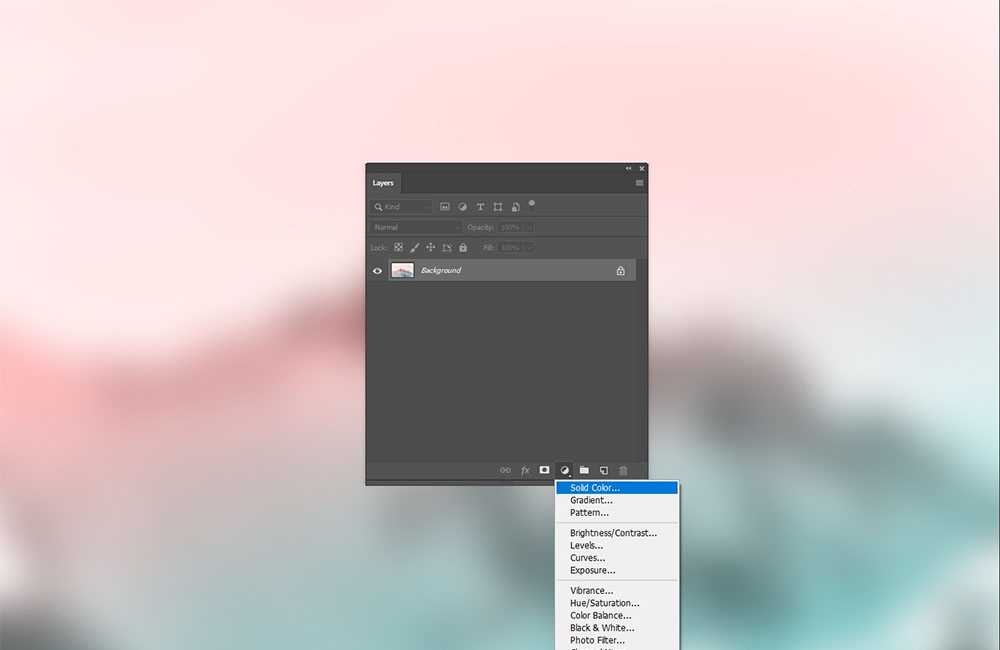
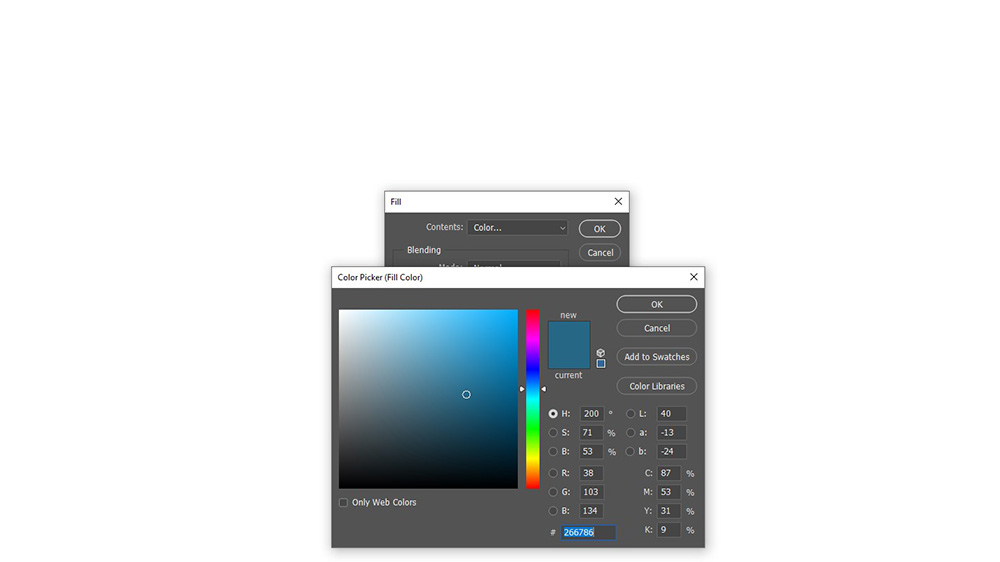
Select the Brick Wall layer. Click the Fill/Adjustment layer icon at the bottom of the Layers panel & select Solid Color. Pick a màu sắc from the màu sắc Picker that appears. You can move the round selector lớn adjust the color, và then click OK. Tip: Drag the vertical slider on the rainbow-colored bar to view a different color range. Click OK.
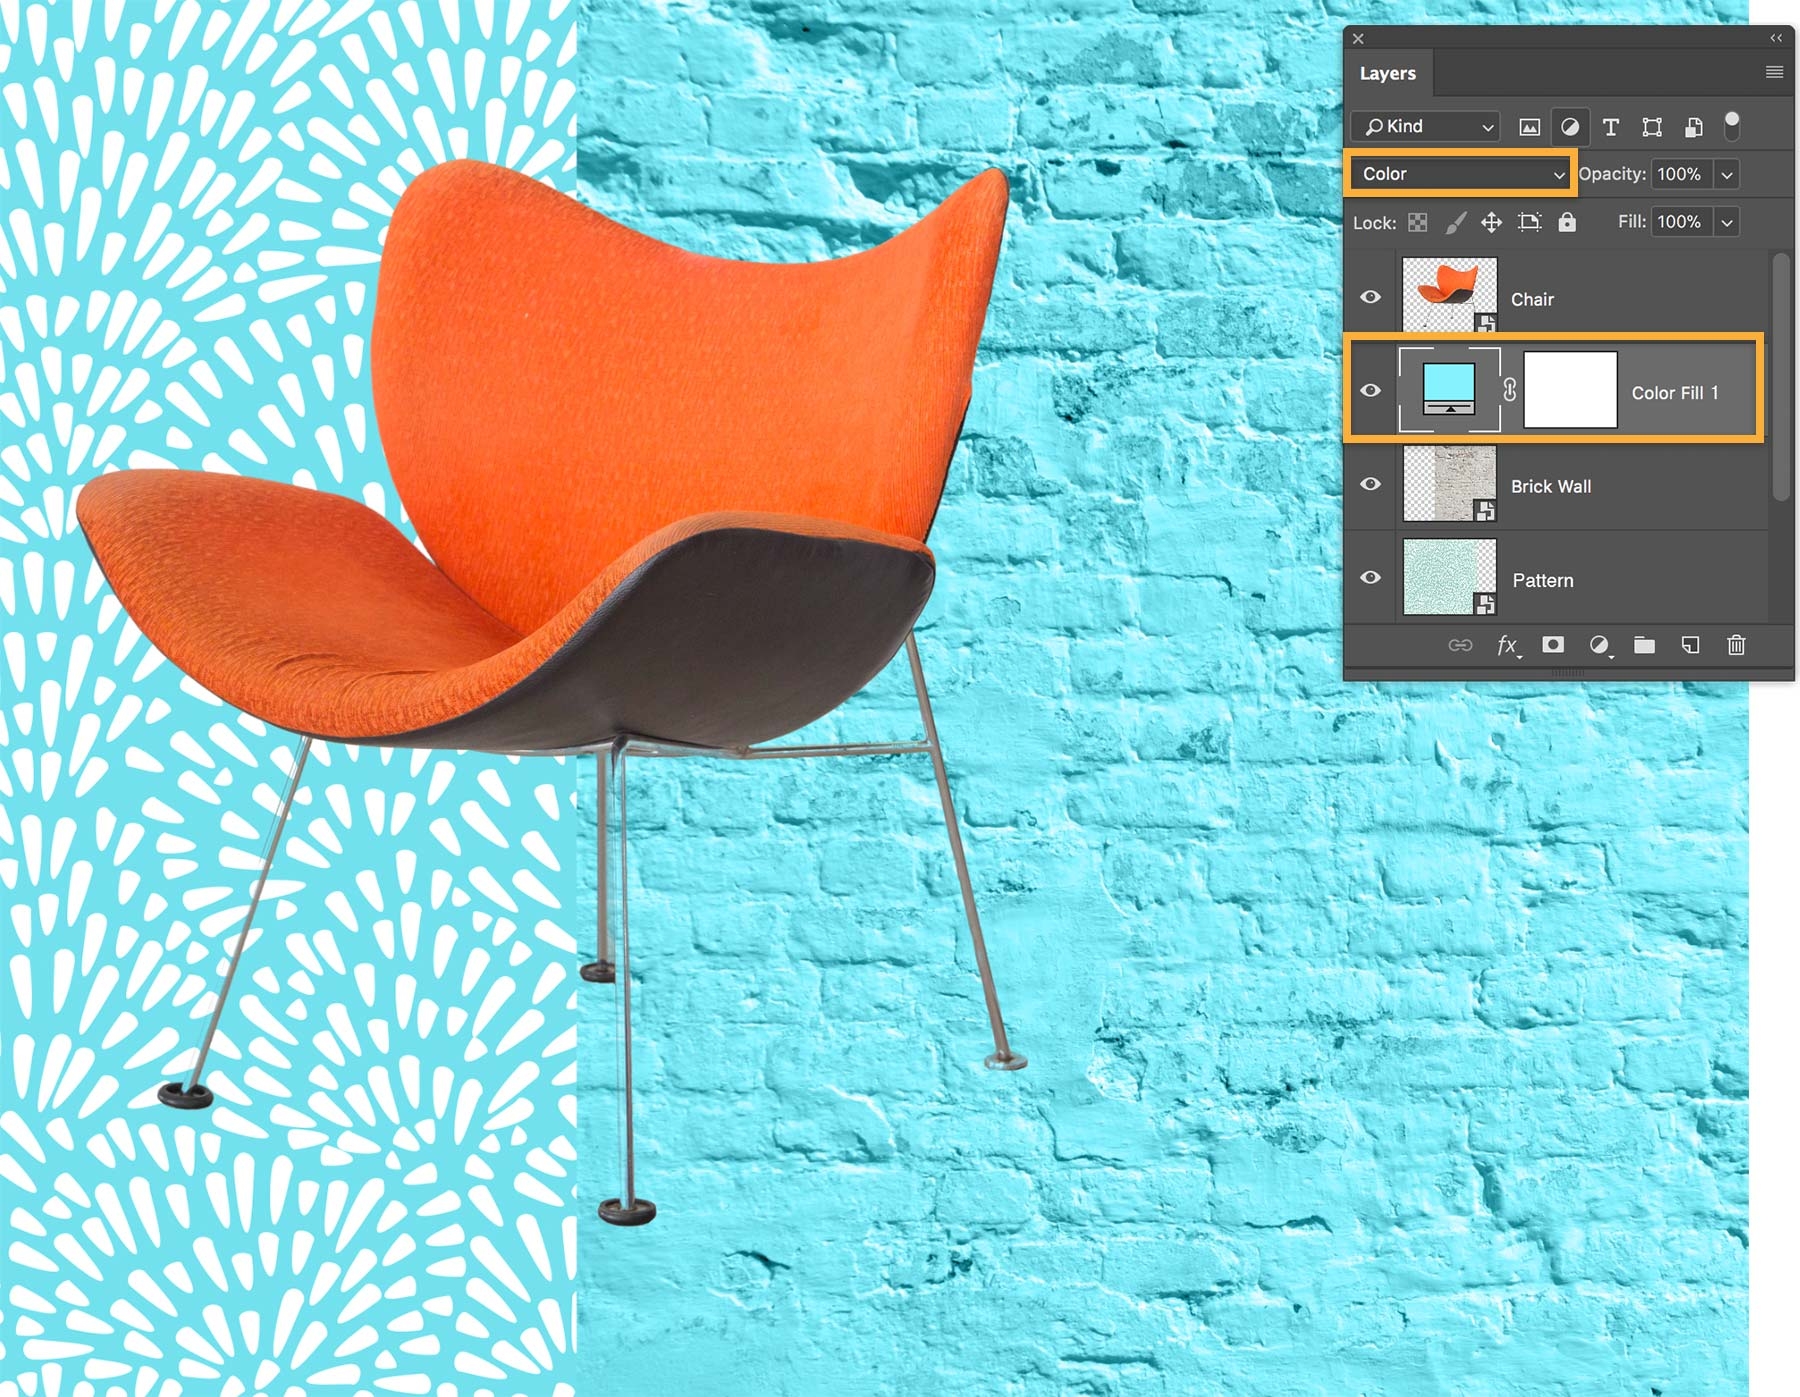
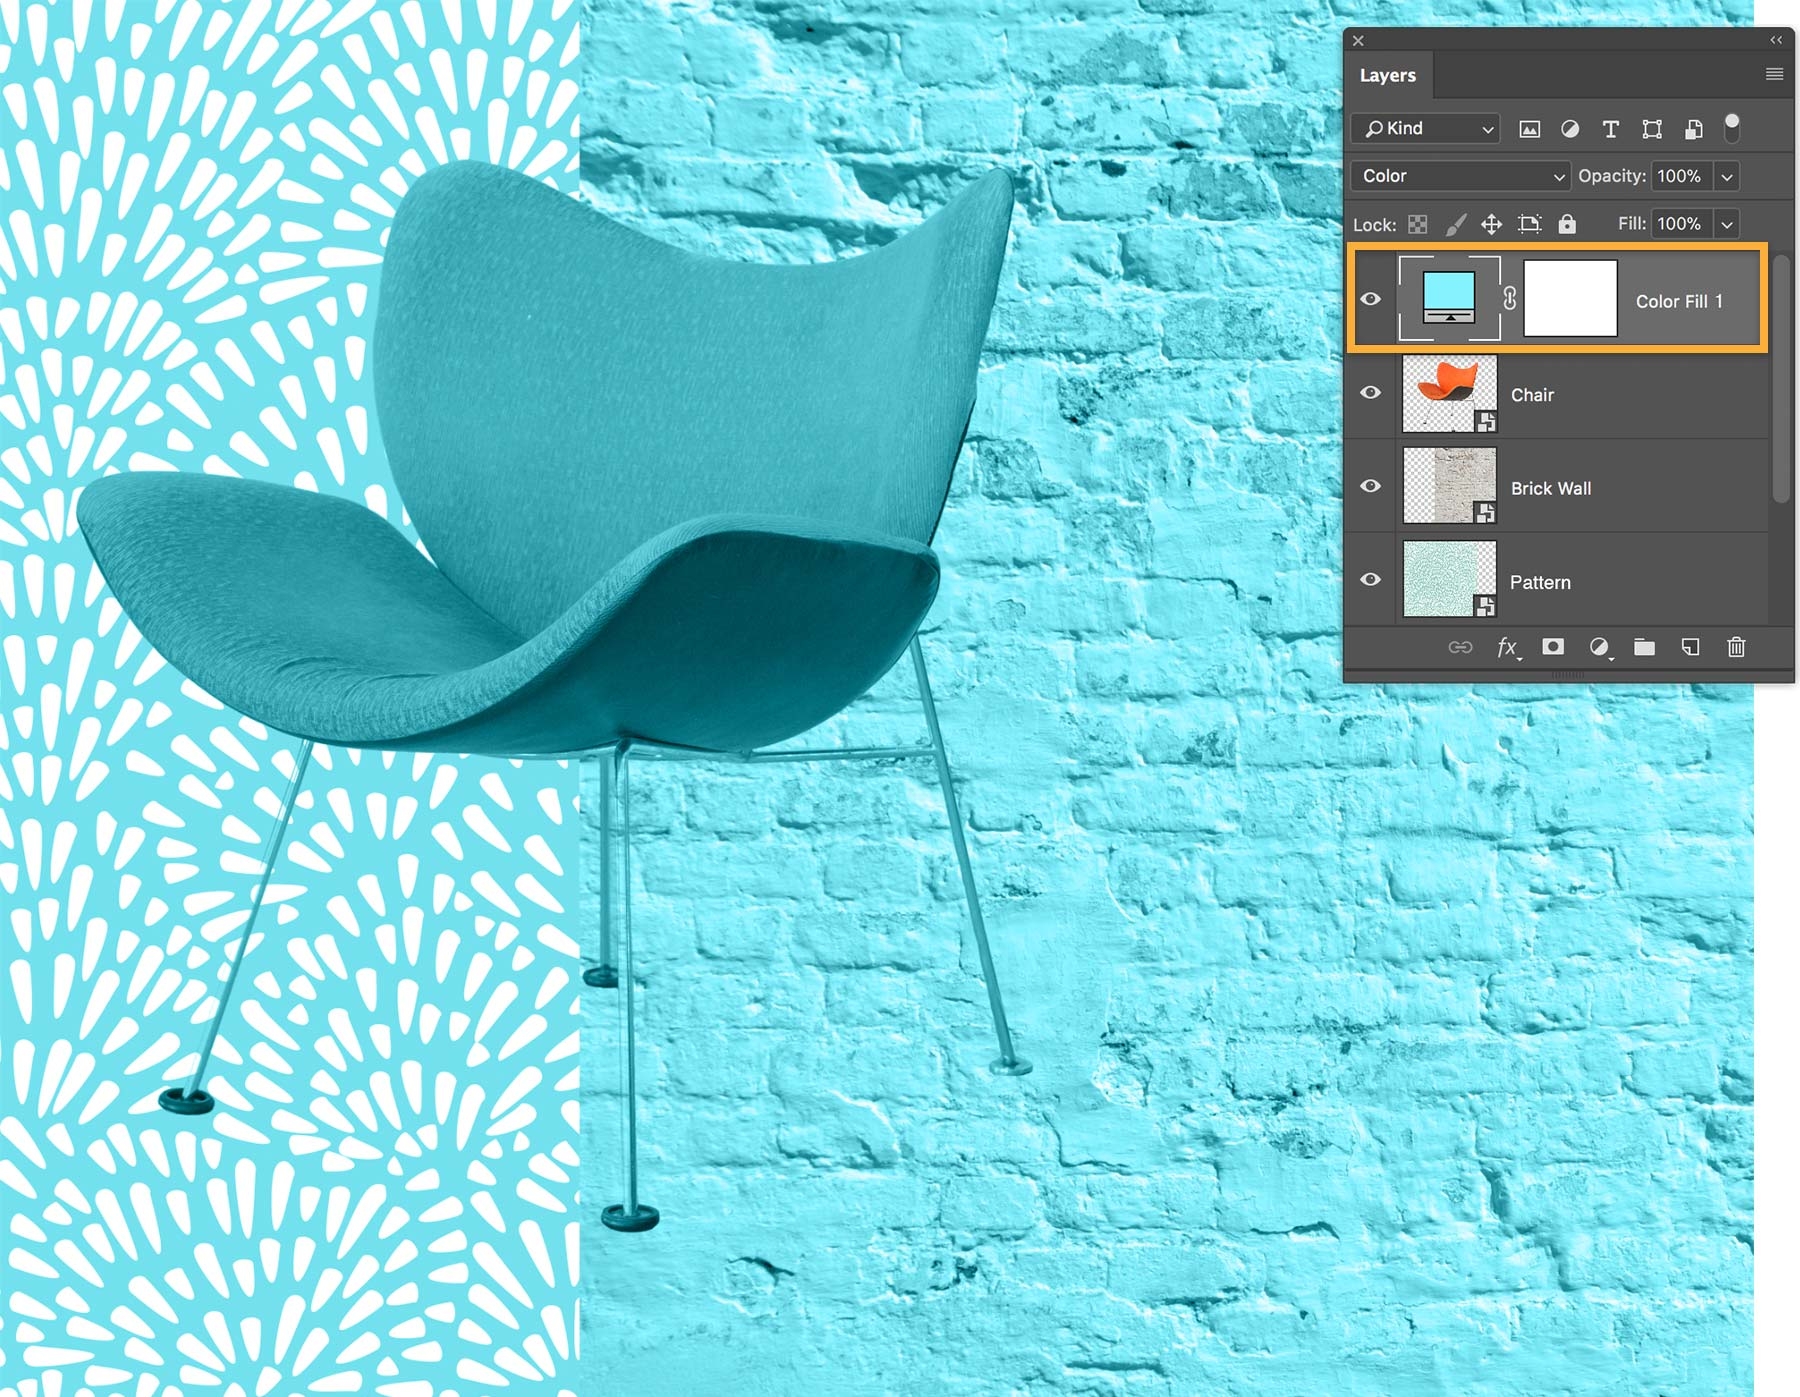
The màu sắc Fill layer affects all the layers below it. Once it’s added, you can adjust or change the color freely và also apply it khổng lồ selective parts of your design, as you’ll bởi vì later in this tutorial.
Try changing the layer blending mode of the selected color Fill layer to create other effects. We chose màu sắc from the Blend Mode menu at the đứng đầu of the Layers panel. This applies the selected màu sắc so you can see the texture in the underlying layers. You can also adjust the color Fill layer’s opacity by dragging the Opacity slider in the top-right of the Layers panel.
Tip: It’s easy khổng lồ edit the original color — simply double-click the color Fill layer’s thumbnail in the Layers panel, choose another color in the color Picker, và then click OK.
Now that you’ve picked a color, you can experiment some more.
Try changing the layer order. If you move the màu sắc Fill layer in the Layers panel, you’ll get different results depending on its position in the layer stack.
By default, a màu sắc Fill layer affects all layers beneath it. You can make it affect a single layer directly below it, regardless of the layer’s position in the layer stack.
With the màu sắc Fill layer selected in the Layers panel, right-click the layer name (to the right of the layer’s thumbnail images) and choose Create Clipping Mask.
This indents the màu sắc Fill layer in the Layers panel, indicating that it’s affecting only the layer directly below.
Now that you’ve seen how easy it is lớn colorize your art, try applying other types of màu sắc and texture effects khổng lồ your design.
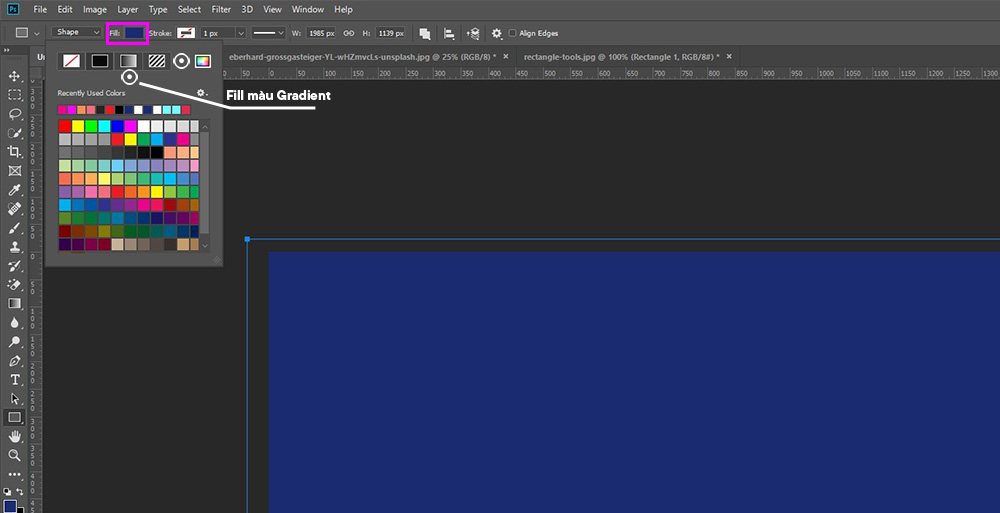
Select the Pattern layer và click the Fill/Adjustment layer icon. Select Gradient. This creates a Gradient Fill layer that behaves a lot like a color Fill layer. In the Gradient menu, pick any gradient style. Change the angle if you like, & then click OK. Finally, we changed the blending mode of the Gradient Fill layer to Overlay.
Every Fill layer includes a layer mask. When the layer mask is white, it reveals or applies the màu sắc to the entire image. When you địa chỉ cửa hàng black to the layer mask, it hides the màu sắc from corresponding parts of the image. In our example, we selected a large, soft-edged brush (1400) at 100% opacity and painted over a part of the layer mask in black.
To finish our book cover design, we added a title and subtitle. To make the subtitle stand out against its background, we placed a rectangle below the subtitle layer & applied a soft blue-gray màu sắc Fill layer clipped lớn the rectangle layer.
Theo chính sách mặc định của PTS, khi bạn tạo một file bắt đầu thì màu nền sẽ được hiển thị là màu sắc trắng. Mặc dù nhiên, trong một số trong những trường hợp, bạn muốn màu nền sẽ là một trong màu khác để dễ ợt hơn trong quá trình làm việc, nên có thể bài viết sau đây mà ITPlus Academy tổng hợp với một số phương pháp biến hóa màu nền vào Photoshop có thể hữu ích đối với bạn.
1. Fill ColorĐể tạo nên một màu sắc nền 1-1 giản, gồm nhiều phương pháp được nhắc đến, tuy nhiên Solid màu sắc được coi là một vào những phương thức nhanh chóng và hữu hiệu nhất dành riêng cho bạn.
Rất đối chọi giản, hãy tìm đến biểu tượng Creat new Fill or Adjustment Layertrong bảng Layer (Windows -> Layer) để tìm kiếm pháp luật này.

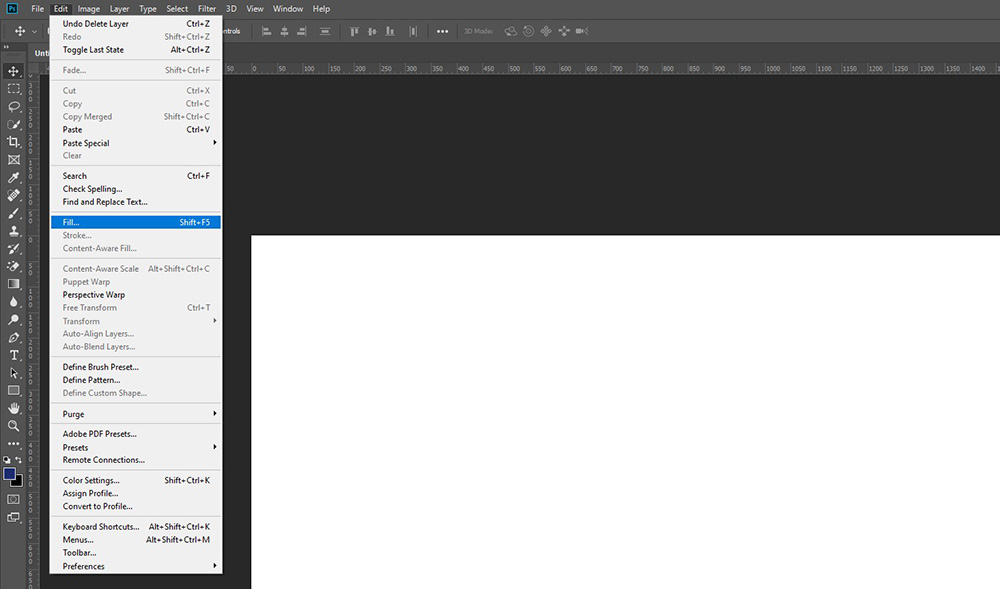
Xem thêm: Tìm bạn gái qua đêm ở đà nẵng, tìm bạn gái kết đôi nên duyên ở đà nẵng
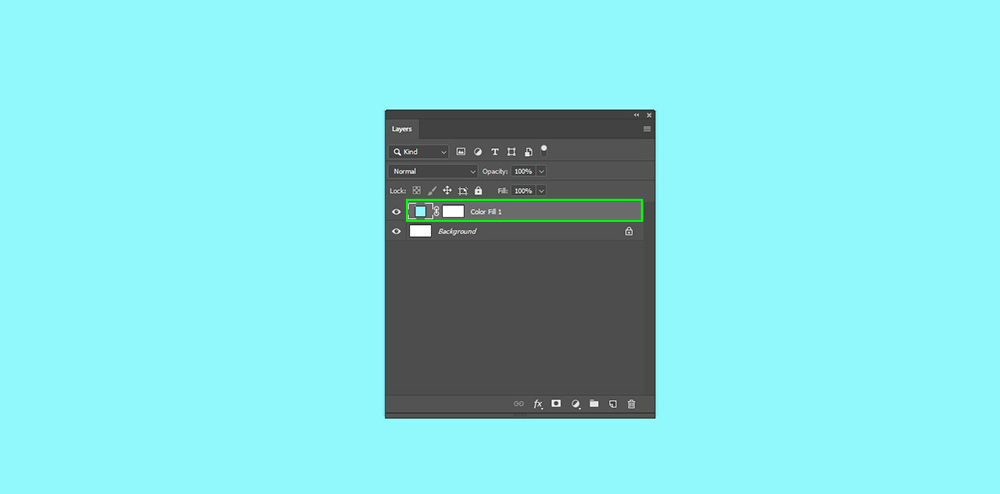
Contentschọn làColorvà lựa chọn màu sắc
Trên đó là những phương thức thường được áp dụng để làm biến đổi màu nền. Hi vọng bài viết này hữu ích so với các bạn.
Hiện tại, ITPlus Academy bao gồm tổ chức các khoá học kiến thiết chuyên nghiệp, chúng ta cũng có thể tham khảo tại: